Watch a video on how to handle the content of your shop.
You can edit the content of the pages in your shop within the editor. You can find basic information on the editor in the article Introduction: Editing content with the editor.
1. Open the editor by selecting Editor in the main menu within the administration area of your shop.
2. In the sidebar under Pages you will now see a list of your shop’s pages. Select the page that you would like to edit.
3. Your shop will be shown on the right-hand side. You can now edit your content as described below.
You can add new elements like texts or images on your start page, category pages and content pages. It is not possible to add elements on the legal pages.
On the example pages already set up for your shop, you will find some existing elements that you only need to edit. Any new content pages you create are empty and will need to have elements added to them.
To the left in the sidebar, select Content elements to find various elements that you can simply “drag and drop” into your shop on the right side. If, for instance, you would like to add an image to a particular page, you can simply drag that element to the required location into your shop on the right side by holding the left mouse button down.
Here, the blue areas will show you the locations where you can add the element.
Editing a text element
1. Within your shop on the right side, select the text element.
2. You can now modify and format the text. To format a particular text passage, select it. You will then have access to the following formatting options, with which you are probably familiar from programs like Microsoft Word.
Option and description
Choose whether the selected text consists of body copy (i.e. standard text) or a heading.

Text is displayed in bold.

Text is displayed in italics.

Text is underlined. We recommend that you use this option only for links.

Text is formatted as a quotation.

A link is added to the text. After selecting the link symbol, you should enter the Internet address to which the link should lead.

If the selected text already had a link, that link is now removed.

Text is shown within a numbered list. Each line is shown as a separate list item.

Text is shown in a list of bullet points. Each line is shown as a separate list item.

Text is left-aligned, centred or right-aligned.
Adding an image
1. In the sidebar on the left side, select one of the content elements that contains an image and drag the element to the required location on the page by holding the left mouse button down. Here, the blue areas will show you the locations where you can add the element.
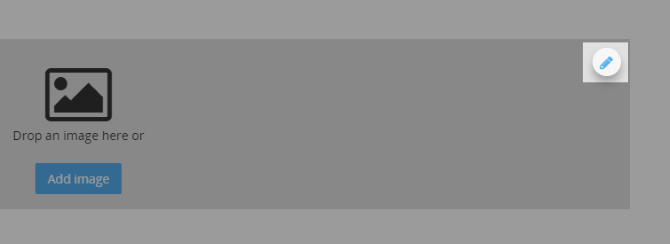
2. A placeholder for the element has been added. You now have two options for adding an image.
-
Select Add image and select the image from your computer
-
Drag an image from your computer to the placeholder
1. Within your shop on the right side, move the mouse pointer onto the placeholder for the image and select the edit symbol.
2. If you would like to use a different image, select Change Image and upload a different image from your computer.
3. Under Alternative text, you can enter a text, such as a short description of the image. The text will be displayed in your shop in cases whether the image cannot be loaded. This is also used for any visually impaired people who visit your shop using a screen reader. For more information, read the article Alternative texts for images.

4. If you would like the image to be linked, under Link enter an Internet address. If visitors then select the image, they will be taken to the relevant page. This provides you with a useful way of adding links to other pages within your shop. Under Open link in new window, you can specify whether the link should be opened in a new window.
Links within your shop should not open in a new window. If, however, you link to external pages, they should ideally open in a new window. This will ensure that your shop remains open in the customer’s browser window.
5. Save your changes.
6. If you would like to adjust the size of the image or change the part of the image that is shown, move the mouse pointer over the image and select the cropping icon. You can find more information on this in the article Cropping images.
The changes to the image will be shown to your customers within your shop.
Adding a video
1. In the sidebar on the left side, select YouTube video and drag the element to the required location on the page by holding the left mouse button down. Here, the blue areas will show you the locations where you can add the element.
2. Select Add Video.
3. Under Video URL, enter the Internet address of a video – such as https://www.youtube.com/watch?v=CzAupSM8jdU
4. Save your changes.
The video will now be shown to your visitors.
Editing a video
1. Within your shop on the right side, move the mouse pointer onto the video placeholder and select the edit symbol.
2. Under Video URL, enter the Internet address of a YouTube video – such as https://www.youtube.com/watch?v=CzAupSM8jdU
3. Save your changes.
The image slider is a topic panel on which visitors to your shop are shown several large-format images alternately. You can add up to five different images.
The image slider always takes up the full width of the page.
Adding an image slider
In the sidebar on the left side, select Image slider and drag the element to the required location in your shop on the right side by holding the left mouse button down. Here, the blue areas will show you the locations where you can add the element.
A placeholder for the element has been added.
Editing an image slider
1. Select Add image on the image slider
2. You will now see options for adjusting all of the settings for the image slider. Using the slider above, choose the number of seconds before the image shown is replaced by the next one.
3. There are two options for adding images to the image slider:
-
Select Add image and select the image from your computer
-
Drag an image from your computer desktop to Drop an image here
4. Under Alternative text, you can type in text, such as a short description of the image. The text will be displayed in your shop in cases whether the image slider cannot be loaded. This is also used for any visually impaired people who visit your shop using a screen reader.
5. If you would like an image slider image to be linked, under Link enter an Internet address. If visitors then select the image, they will be taken to the relevant page. This provides you with a useful way of adding links to other pages within your shop. Under Open link in new window, you can specify whether the link should be opened in a new window.
Links within your shop should not open in a new window. If, however, you link to external pages, they should ideally open in a new window. This will ensure that your shop remains open in the customer’s browser window.
6. You can also align the images of the image slider. For more information on this read the article Image alignment in the image slider.
7. To add another image, select the next placeholder and go back to step 3.
8. Save your changes.
The preferred sizes of the image slider images depend on the theme you are using.
-
Neutral: 1400 x 686 pixels
-
Vision: 2000 x 500 pixels
-
Essence: 1400 x 412 pixels
-
Limelight: 2000 x 500 pixels
-
Editorial: 2000 x 500 pixels
-
Uptown: 1400 x 686 pixels
-
Structure: 1400 x 412 pixels
You can display a map from Google Maps on the pages of your shop. For instance you can show your customers where your physical store is located.
1. Visit Google Maps and search for the location you would like to show on the map.
2. Select Share.
3. Select Embed a map.
4. Copy the link that is shown there.
5. Visit your shop's administration area and select in the main menu Editor.
6. In the sidebar under Pages you will now see a list of your shop’s pages. Select the page that you would like to edit.
7. Select Content elements.
8. Select an element with Google Maps and drag it to the required location on the page by holding the left mouse button down. Here, the blue areas will show you the locations where you can add the element.
9. Select Add Google Maps.
10. Under Embed a map paste the link from Google Maps.
11. Select Save.